
With climate change and extreme weather events on the rise, having access to real-time weather data is more crucial than ever. But what if you live in a remote area or simply want an independentDIY weather station that doesn’t rely on the power grid? A solar-powered weather station is the perfect solution. In this guide, we’ll walk you through the steps to build your own off-grid weather tracking system, from selecting components to setting up data transmission.
Why Build a Solar-Powered Home Weather Station?
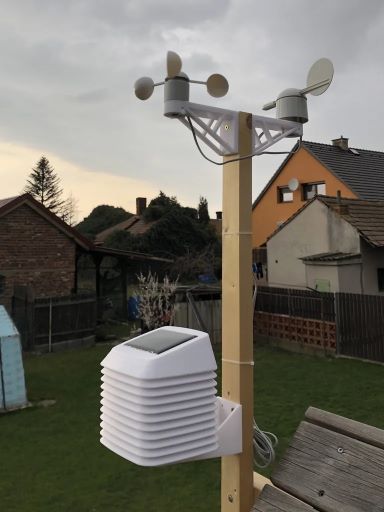 Source: Open Green Energy, Instructables.com
Building your own solar-powered weather station offers several benefits:
- Energy independence. Harness the sun’s power to operate continuously without relying on external power sources.
- Remote monitoring. Perfect for rural areas, farms, research stations, or emergency preparedness.
- Data collection. Want to compare your readings with real-time radar data? A DIY station gives you localized insights, while RainViewer helps you track regional weather patterns, storm movements, and precipitation trends for a complete picture.
- Customization. You can choose the sensors and connectivity options that best suit your needs.
Essential Components
To build a solar-powered weather station, you will need the following components:
1. Weather Sensors: Humidity, Wind Speed etc.
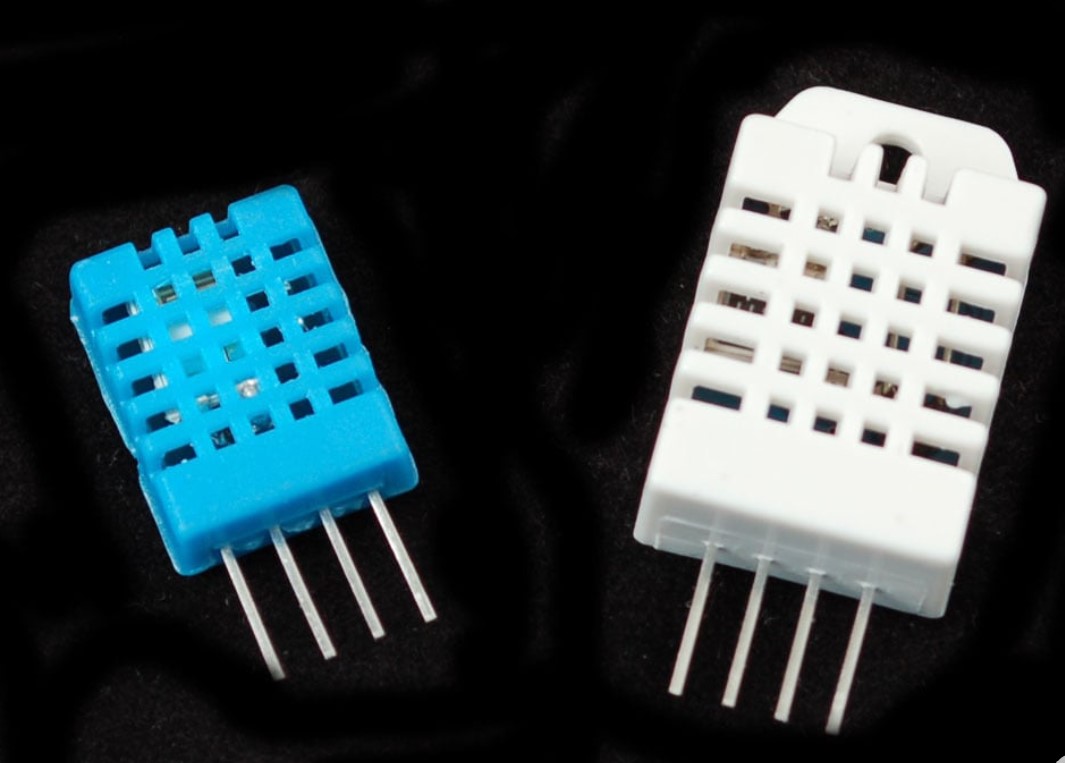 Source: Adafruit
The core function of a weather station is collecting meteorological data. You’ll need sensors to measure:
- Temperature and humidity: a DHT22 or SHT31 sensor.
- Barometric pressure: a BME280 or BME680 sensor.
- Wind speed and direction: an anemometer and wind vane.
- Rainfall: a tipping bucket rain gauge.
- Solar radiation (optional): a pyranometer.
2. Microcontroller or Single-Board Computer
 Source: SparkFun Electronics, CC BY 2.0
, via Wikimedia Commons
Source: SparkFun Electronics, CC BY 2.0
, via Wikimedia Commons
A microcontroller or a single-board computer processes sensor data and transmits it. Popular choices include:
- Arduino (e.g., Arduino Uno, Arduino Mega): easy to program and energy-efficient.
- Raspberry Pi: more powerful but consumes more energy.
- ESP32 board: perfect for wireless communication and low power consumption.
3. Solar Power System: Solar Panel, Battery Voltage Regulator
To keep your weather station running off-grid, you need a reliable source of continuous power supply:
- Solar panel: a 10W or higher panel depending on power consumption.
- Charge controller: manages energy flow and prevents overcharging.
- Battery: a 12V deep-cycle or LiFePO4 battery ensures operation during cloudy days.
- Voltage regulator: ensures a stable power supply for the microcontroller and sensors.
4. Enclosure and Mounting
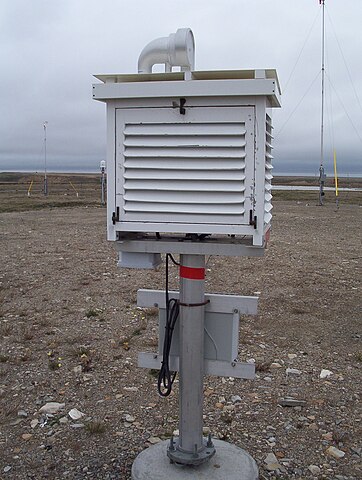 Source: Wikipedia
Your weather station should be weatherproof and well-positioned for accurate readings:
- Stevenson screen: a ventilated enclosure to protect the temperature and humidity sensors.
- Pole or tripod mount: ensures stable placement for wind and rain sensors.
- Waterproof box: Protects electronics from the elements.
5. Connectivity for Data Transmission, e.g. WiFi or LoRa
Choose how you’ll access your weather data:
- Wi-Fi: If within range of a network, an ESP8266 or ESP32 can send data.
- LoRa: Perfect for long-range, low-power transmission.
- Cellular (GSM/4G/LTE): Use a SIM card-based module for remote locations.
- SD Card Logging: Store data locally if internet access is unavailable.
Step-by-Step Assembly
Step 1: Assemble and Test Sensors
Before permanent installation, connect all sensors to your microcontroller and test their readings using simple scripts. Libraries like Adafruit or SparkFun provide pre-written code for common sensors.
Step 2: Configure Power System
 Source: Open Green Energy, Instructables.com
- Connect the solar panel to the charge controller.
- Attach the battery to the charge controller output.
- Use a voltage regulator to supply stable power to the microcontroller and sensors.
Step 3: Collect and Transmit Program Data
- Write a script to read data from sensors at regular intervals.
- Format the data for easy transmission or storage.
- If using Wi-Fi or cellular, set up cloud data logging (e.g., ThingSpeak, Blynk, or a self-hosted server).
Step 4: Build the Enclosure and Install Components
- Place the microcontroller, charge controller, and battery in a waterproof enclosure.
- Mount the temperature and humidity sensor inside a Stevenson screen.
- Secure the wind and rain sensors on a pole at least 5 ft (1.5 m) above the ground.
- Position the solar panel for maximum sunlight exposure.
Step 5: Deploy and Monitor
- Choose an open area away from buildings and trees for accurate weather measurements. Compare your data with RainViewer’s local radar to fine-tune placement and calibration.
- Regularly check battery levels and clean solar panels for optimal performance.
- Validate data accuracy by comparing with nearby official weather stations.
That’s it! Your weather station is fully solar-powered.
Applications of an Off-Grid Weather Station
- Agriculture: Monitor local weather conditions for irrigation and crop planning.
- Hiking and camping: Get real-time weather updates in remote locations.
- Disaster preparedness: Stay prepared for floods or storms.
- Scientific research: Useful for environmental studies and climate monitoring.
- Community sharing: Contribute data to open-source weather networks.
Conclusion
Building a solar-powered weather station may seem complex, but with the right components and careful assembly, you can create a reliable system for off-grid weather tracking. Take your weather tracking to the next level. Build your station, compare it with RainViewer’s radar insights, and fine-tune your forecasts. Got your setup running? Share your results with the community and help improve local weather tracking!